
Introduction to Garage Floor Epoxy Preparation
Transforming your garage into a clean, durable, and visually appealing space starts with proper preparation. Epoxy flooring is one of the most popular upgrades for homeowners in Austin, TX because it offers long-lasting durability, resistance to stains, and a sleek finish. However, the success of any epoxy flooring project depends heavily on how well the surface is prepared beforehand.
Choosing professional Garage Floor Epoxy in Austin services ensures that every step of the preparation process is handled with precision. A trusted company like Craft & Coating Epoxy Artist brings expertise, advanced tools, and high-quality materials to deliver exceptional results that last for years.
Why Proper Preparation Is Critical
Preparation is the most important phase of any epoxy flooring installation. Without it, even the highest-quality epoxy coating can fail prematurely. Proper preparation ensures that the epoxy bonds effectively to the concrete surface, preventing peeling, cracking, and bubbling.
Professional Garage Floor Epoxy Experts in Austin understand that a properly prepared surface leads to better adhesion, enhanced durability, and a flawless finish. Skipping or rushing this step can result in costly repairs and a shorter lifespan for your flooring.
Working with Craft & Coating Epoxy Artist ensures that your garage floor is prepared to the highest standards, maximizing both performance and aesthetics.
Step 1 Clear Out the Garage Completely
The first step in preparing your garage is removing everything from the space. This includes vehicles, tools, storage units, and any other items.
Clearing the garage allows for a full inspection of the floor and ensures that no areas are missed during cleaning and preparation. It also provides enough space for professionals to work efficiently.
Organizing your belongings before reinstalling them after the project helps maintain a neat and functional garage.
Step 2 Inspect the Concrete Surface
After clearing the garage, carefully inspect the concrete floor for damage or imperfections. Look for cracks, chips, stains, and uneven surfaces.
Identifying these issues early allows you to address them before applying epoxy. Cracks and holes should be repaired, and any oil or grease stains must be removed to ensure proper adhesion.
Professional services from Craft & Coating Epoxy Artist include thorough inspections to identify and fix all potential problems before installation begins.
Step 3 Deep Clean the Floor
Cleaning the floor is essential for removing dirt, dust, and contaminants that can interfere with epoxy adhesion.
Start by sweeping to remove loose debris. Then use a degreaser to eliminate oil and grease stains. Scrubbing the surface thoroughly ensures that stubborn contaminants are removed.
Pressure washing is often recommended for a deeper clean. This step ensures that the surface is completely free of residue.
If you are searching for Garage Floor Epoxy near me, professional companies typically include advanced cleaning techniques as part of their service.
Step 4 Repair Cracks and Surface Damage
Once the floor is clean, repair any cracks, holes, or imperfections. Use high-quality concrete fillers to create a smooth and even surface.
Allow the repairs to cure fully before moving to the next step. Properly repaired surfaces improve the appearance and durability of the epoxy coating.
Ignoring this step can lead to visible flaws and reduced performance over time.
Step 5 Etch or Grind the Concrete Surface
Etching or grinding is necessary to create a rough surface that allows the epoxy to bond effectively.
Acid etching involves applying a solution that opens up the pores of the concrete. Grinding uses specialized equipment to create a textured surface.
Professional Garage Floor Epoxy Experts in Austin often prefer grinding because it provides consistent results and better adhesion.
This step is crucial for ensuring that the epoxy coating remains durable and long-lasting.
Step 6 Test for Moisture Issues
Moisture is one of the biggest challenges in epoxy flooring. Excess moisture can prevent proper bonding and cause the coating to fail.
Conduct a moisture test to determine if the concrete is suitable for epoxy application. If moisture levels are high, additional steps such as sealing may be required.
Craft & Coating Epoxy Artist ensures that moisture levels are properly managed before proceeding with installation.
Step 7 Apply a Primer for Better Adhesion
Applying a primer is an optional but highly recommended step. A primer enhances adhesion and creates a strong bond between the concrete and the epoxy coating.
Primers also help seal the surface and reduce the risk of air bubbles forming during application.
This step contributes to a smoother and more durable finish.
Step 8 Ensure Proper Ventilation
Proper ventilation is important during the epoxy application process. Epoxy coatings can produce fumes, so adequate airflow is necessary for safety.
Open doors and windows, and use fans to improve air circulation. Professional installers follow strict safety guidelines to ensure a safe working environment.
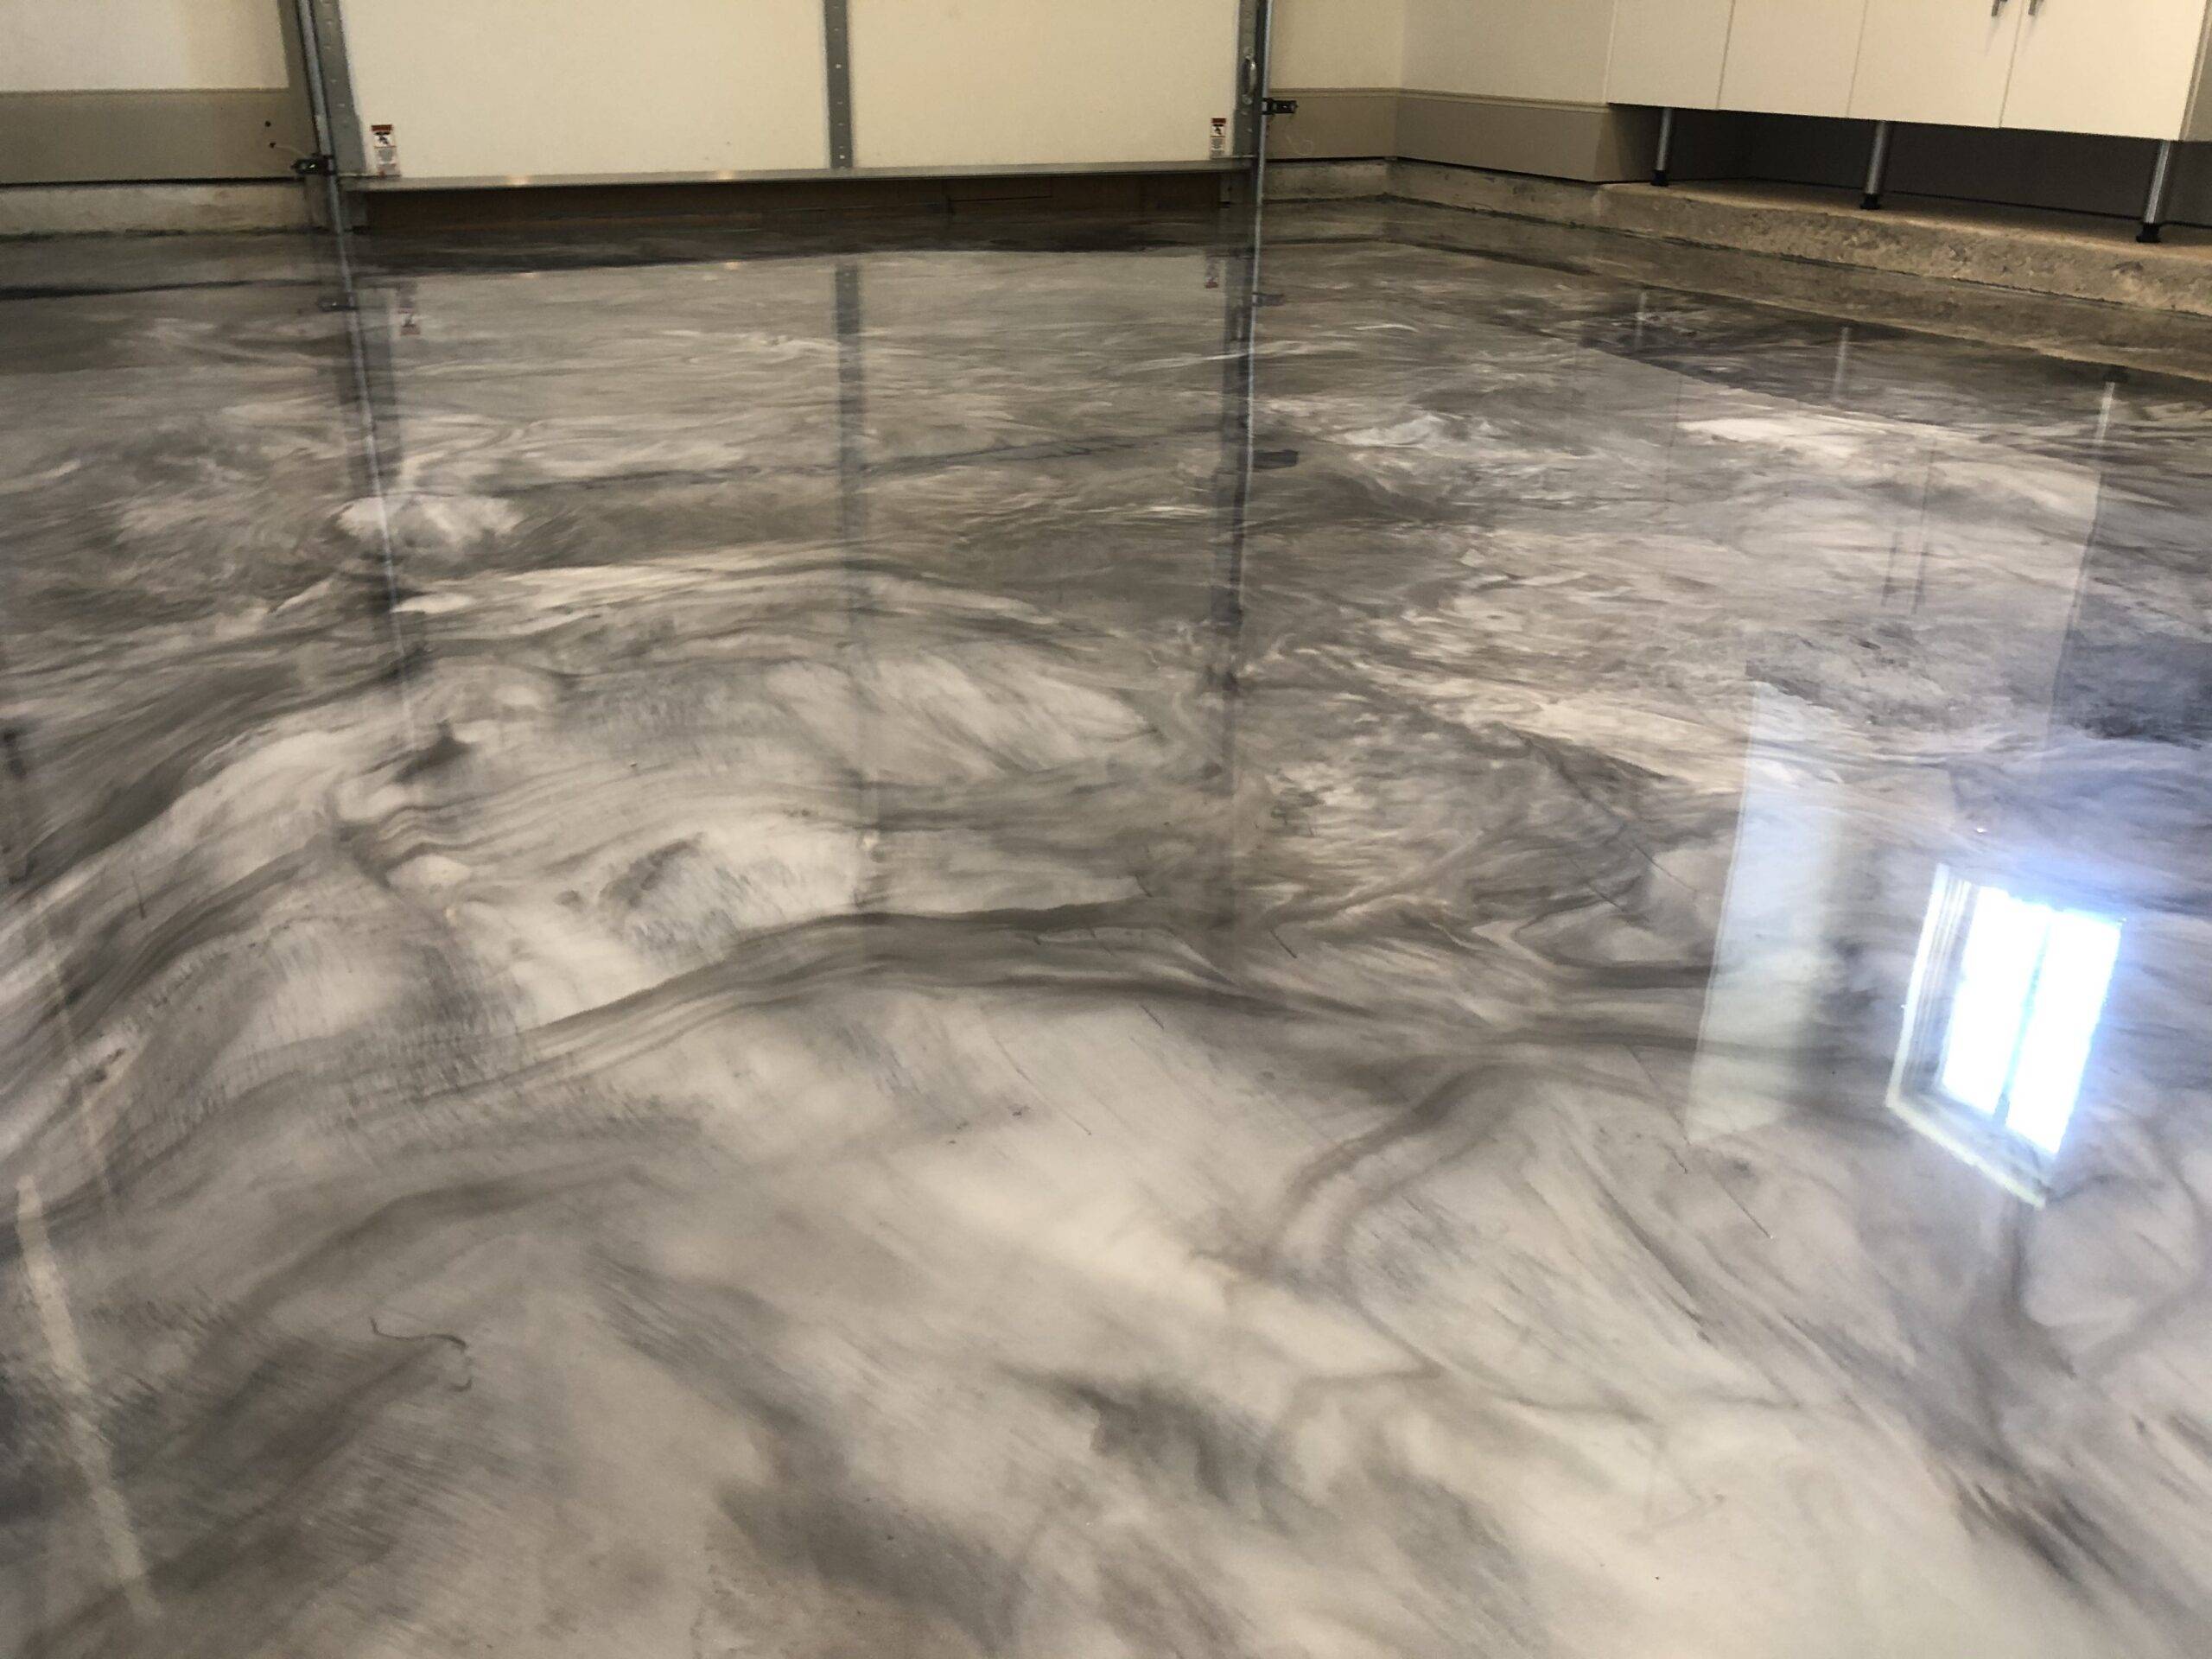
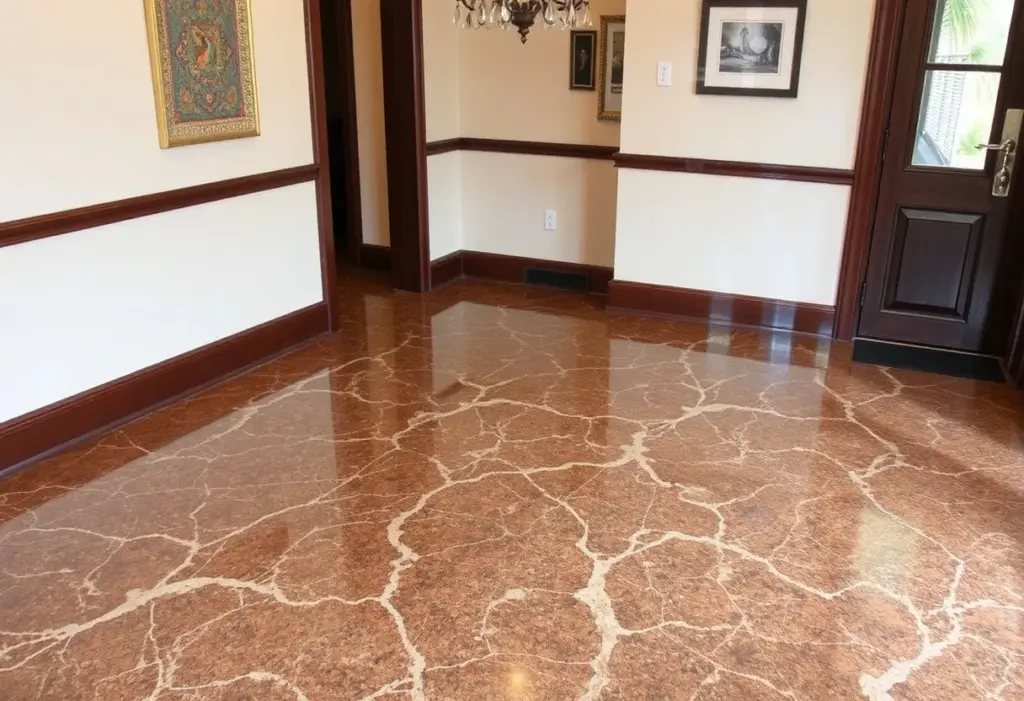
Step 9 Choose the Right Epoxy Coating
Selecting the right epoxy coating is essential for achieving the desired look and performance.
Options include solid colors, metallic finishes, and decorative flakes. Consider factors such as durability, slip resistance, and design preferences.
Working with Craft & Coating Epoxy Artist helps you choose the best coating for your garage based on your specific needs.
Step 10 Allow Proper Curing Time
After the epoxy is applied, it is important to allow sufficient curing time. This ensures that the coating hardens properly and achieves maximum durability.
Avoid walking or placing heavy items on the floor during this period. Following recommended curing times helps prevent damage and ensures long-lasting results.
Benefits of Professional Epoxy Flooring Installation
Hiring professionals provides several advantages that improve the overall outcome of your project.
Expert Preparation
Professionals ensure that every step is completed correctly for optimal results
High Quality Materials
Using premium materials enhances durability and performance
Time Efficiency
Professional teams complete the job quickly and efficiently
Long Lasting Results
Proper installation ensures durability and resistance to wear and tear
Choosing Garage Floor Epoxy in Austin services from experienced professionals guarantees superior quality.
Why Choose Craft & Coating Epoxy Artist
Craft & Coating Epoxy Artist is a trusted name in Austin for high-quality epoxy flooring solutions. Their team of skilled professionals specializes in preparing and installing epoxy floors with precision and care.
With a focus on customer satisfaction, Craft & Coating Epoxy Artist delivers customized solutions that meet each client’s needs. Their expertise ensures that your garage floor is not only visually appealing but also durable and long-lasting.
Choosing Craft & Coating Epoxy Artist means investing in quality workmanship and reliable service.
Maintenance Tips After Installation
Maintaining your epoxy floor helps preserve its appearance and durability.
Regular cleaning removes dirt and debris that can scratch the surface. Avoid using harsh chemicals that may damage the coating.
Use protective pads under heavy equipment to prevent scratches. Periodic inspections help identify and address minor issues early.
Proper maintenance ensures that your epoxy flooring remains in excellent condition for years.
FAQs
How long does it take to prepare a garage for epoxy flooring
Preparation typically takes one to two days depending on the condition of the floor
Do I need to repair cracks before applying epoxy
Yes, repairing cracks ensures a smooth and durable finish
Can I apply epoxy flooring myself
Professional installation is recommended for best results and durability
How long does epoxy flooring last
With proper maintenance, epoxy floors can last 10 to 20 years
Is epoxy flooring slippery
Slip resistant additives can be included to improve safety
How do I find Garage Floor Epoxy near me
Search online and choose experienced professionals with strong reviews
Conclusion
Related: Professional Epoxy Floor Installation in Austin TX: Complete Guide
Preparing your garage for epoxy flooring requires careful planning, proper cleaning, and attention to detail. Each step, from clearing the space and repairing damage to ensuring proper moisture levels and curing time, plays a crucial role in achieving a durable and visually appealing finish.
Choosing professional Garage Floor Epoxy in Austin services ensures that your project is handled with expertise and precision. With a trusted provider like Craft & Coating Epoxy Artist, you can transform your garage into a functional, stylish, and long-lasting space.