
How to Prepare Garage Floor for Epoxy in Texas: Complete 2026 Installation Guide
Quick Answer
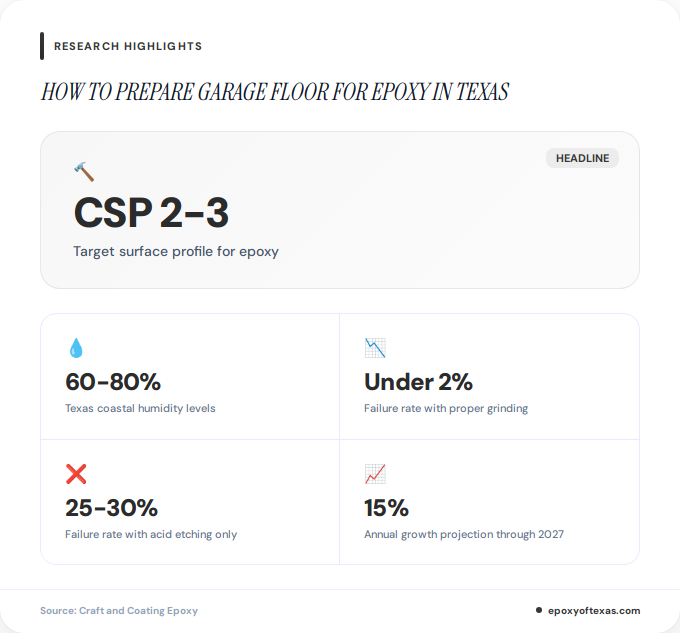
Preparing a garage floor for epoxy in Texas requires diamond grinding to achieve CSP 2-3 surface profile, thorough cleaning to remove oils and contaminants, repairing all cracks and damage, and testing for moisture vapor transmission, especially critical given Texas’s high humidity (60-80% in coastal areas) and expansive clay soils. Professional installers report that proper mechanical grinding reduces epoxy failure rates to under 2%, compared to 25-30% failure with inadequate acid etching on older concrete slabs.
Why Texas Climate Demands Specialized Garage Floor Preparation
If you’re planning to install epoxy flooring in your Texas garage, understanding how to prepare garage floor for epoxy in Texas is absolutely critical to long-term success. The Lone Star State presents unique challenges that can make or break your epoxy installation, with failure rates exceeding 25-30% when preparation is inadequate on older concrete slabs.
Texas homeowners face a perfect storm of environmental factors: extreme heat regularly exceeding 90°F in summer months, coastal humidity ranging from 60-80% in areas like Houston and Galveston, and expansive clay soils throughout Central Texas that cause foundation movement. According to industry analysis from ArmorGarage, epoxy garage floor installations in Texas are projected to grow 15% annually through 2027, driven by home improvement trends in the Dallas-Fort Worth and Houston metropolitan areas.
The stakes are high because improper preparation leads to delamination, bubbling, and premature failure. With 68% of new garages in Texas metros now featuring coated floors, homeowners are investing significant resources into these upgrades. Understanding the Texas-specific preparation requirements is your first step toward a professional-quality result. For broader context on residential applications, see our guide on residential epoxy flooring in Texas.
What Is Diamond Grinding and Why Is It Essential for Texas Concrete?
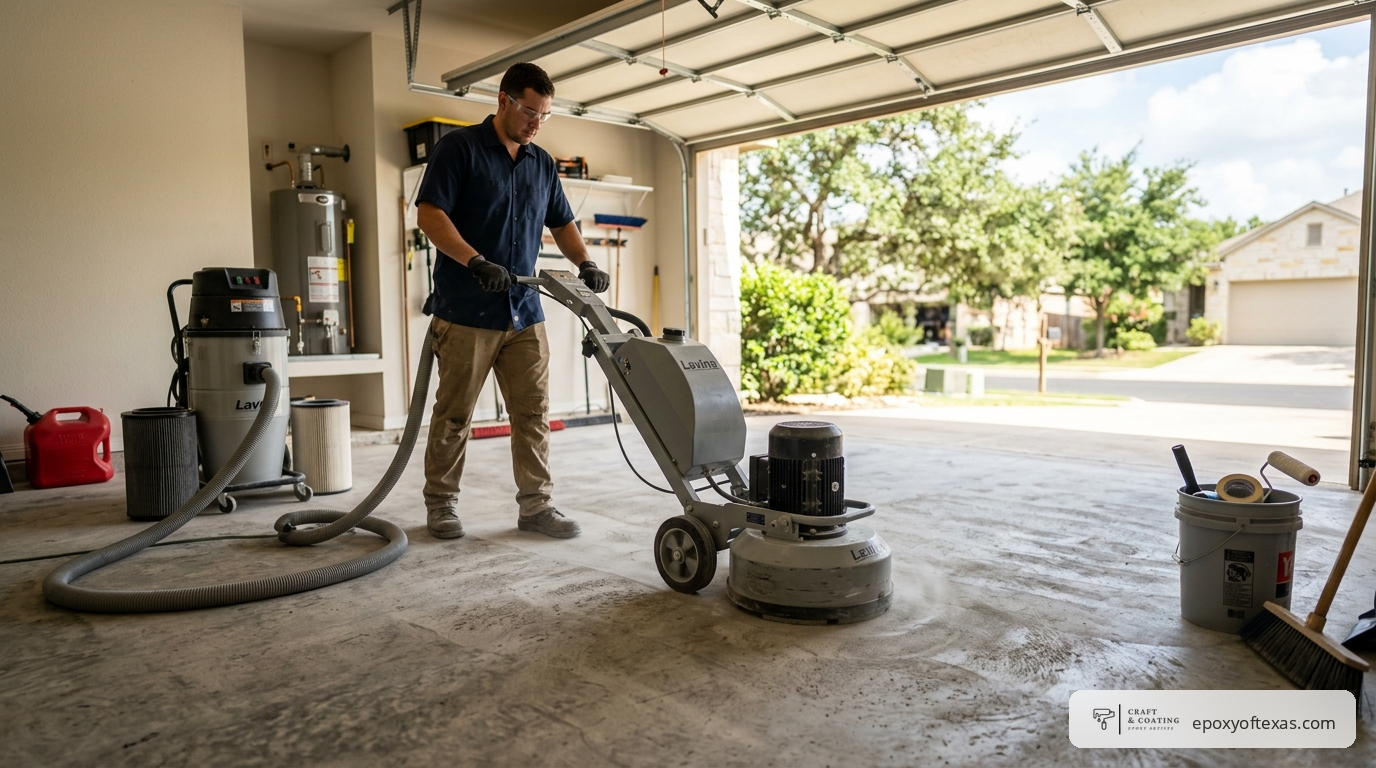
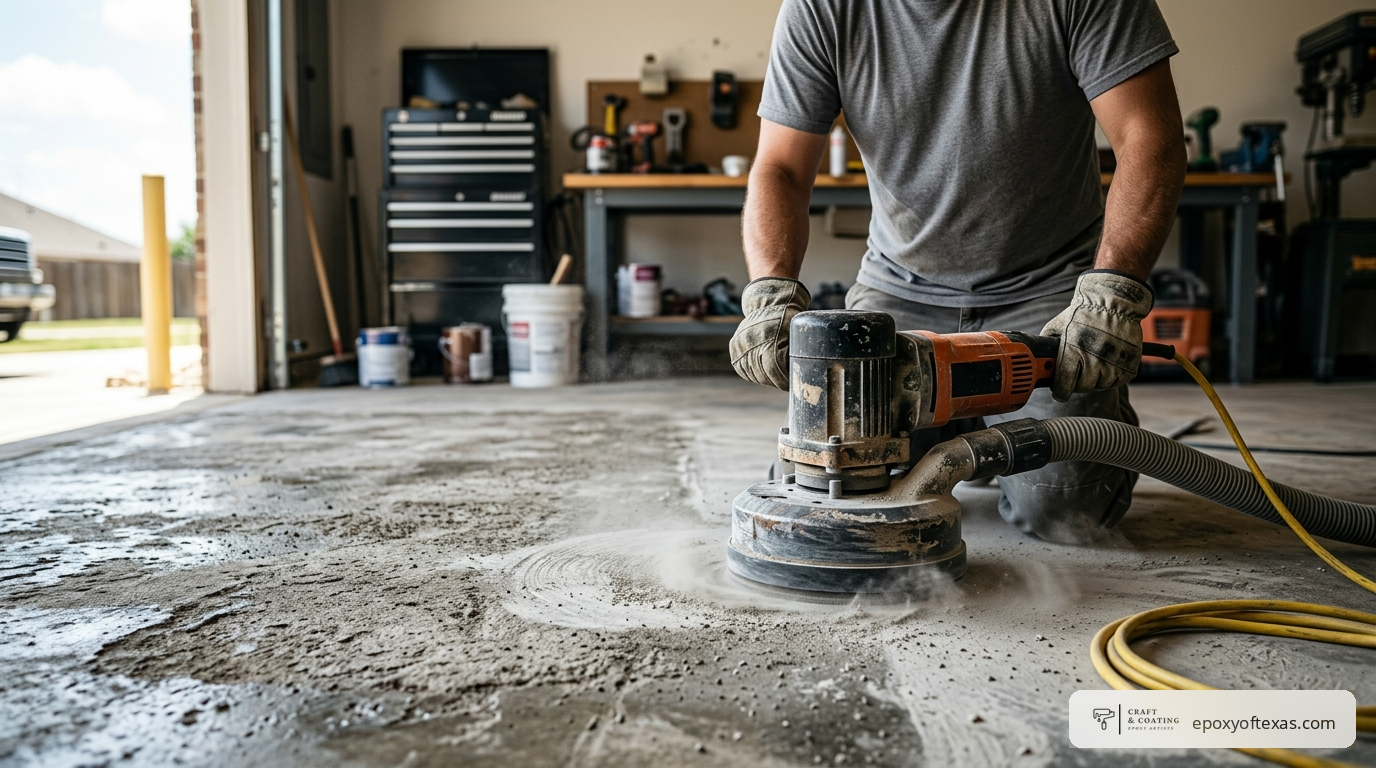
Diamond grinding has emerged as the gold standard for how to prepare garage floor for epoxy in Texas, and for good reason. This mechanical profiling method uses industrial grinders equipped with diamond-impregnated segments to remove the top layer of concrete, creating the optimal surface profile for epoxy adhesion.
Texas concrete is often particularly dense and may have been sealed during construction, making traditional acid etching insufficient. Experts from Premier Edge note that grinding removes the weak laitance layer (typically 1/16 to 1/8 inch thick), exposing fresh aggregate and creating open pores that allow epoxy to penetrate and mechanically lock into the concrete substrate.
The target surface profile is CSP 2-3 (Concrete Surface Profile), which feels like 60-80 grit sandpaper to the touch. This level of texture provides approximately 150-200 square feet of additional bonding surface per square foot of floor, compared to smooth concrete. Professional installers report that achieving this profile through grinding reduces delamination risks by 80% compared to acid etching alone.
| Preparation Method | Surface Profile Achieved | Failure Rate |
|---|---|---|
| Diamond Grinding (CSP 2-3) | Optimal deep profile | Under 2% |
| Acid Etching Only | Minimal surface opening | 25-30% |
| No Preparation | Sealed/smooth surface | 90%+ |
How to Properly Clean and Degrease Your Texas Garage Floor
Before any mechanical preparation begins, thorough cleaning is non-negotiable. Texas garage floors accumulate automotive fluids, lawn equipment residue, and the fine clay dust common throughout the state. Even microscopic contamination can prevent proper epoxy bonding.
Start by removing all items from the garage and sweeping thoroughly. Use a commercial concrete degreaser specifically formulated for oil removal, applying it generously to any stained areas. Let the degreaser dwell for 15-20 minutes, then scrub with a stiff-bristled brush. For stubborn oil stains common in Texas garages, you may need to repeat this process multiple times.
After degreasing, power wash the entire floor with at least 3,000 PSI pressure, working from the back of the garage toward the door. Leading coating manufacturers recommend using a turbo nozzle to ensure complete removal of cleaning agents and loosened contaminants. Allow the concrete to dry completely, which typically takes 24-48 hours in Texas humidity, longer in coastal regions.
How to Test for Moisture in Texas Concrete Slabs
Moisture vapor transmission (MVT) is the silent killer of epoxy installations in Texas, particularly for homes built on slab-on-grade foundations without vapor barriers (common in pre-1990s construction). The state’s expansive clay soils retain moisture and can transmit it through concrete, causing epoxy to bubble and delaminate.
40% of epoxy failures in Texas stem from moisture issues, with MVT exceeding 3 pounds per 1,000 square feet per 24 hours. Testing is mandatory for older homes and essential for anyone serious about how to prepare garage floor for epoxy in Texas. The calcium chloride test is the industry standard: place a sealed container of anhydrous calcium chloride on the clean concrete for 60-72 hours, then weigh it to determine moisture transmission rate.
For readings above 3 lbs/1,000 sq ft/24 hrs, you must apply a moisture-mitigating primer before epoxy. In extremely humid areas like Houston or Beaumont, consider waiting for drier months (typically October through April) for installation. Professional moisture meters can also measure relative humidity within the concrete slab, with readings above 75% RH indicating potential problems.
What Is the Best Method for Repairing Cracks and Damage?
Texas’s expansive clay soils cause foundation movement that creates cracks in concrete slabs. These must be properly repaired before epoxy application, as movement cracks will telegraph through the coating and often widen over time.
For hairline cracks less than 1/8 inch wide, epoxy primer alone may be sufficient to bridge the gap. However, wider cracks require routing with a diamond blade or grinder to create a V-shaped channel, which is then filled with flexible polyurea or epoxy crack filler. Cracks wider than 1/4 inch indicate structural issues that should be evaluated by a foundation specialist before proceeding with epoxy installation.
Spalling (surface delamination) and pop-outs must be ground smooth or filled with concrete patching compound. Allow all repairs to cure fully, typically 24-48 hours for epoxy fillers or 7-14 days for cement-based patches. The repaired areas should then be ground to match the surrounding surface profile. For comprehensive information on professional applications, visit our guide on commercial epoxy flooring in Texas.
Should You Use Acid Etching or Grinding in Texas?
The debate between acid etching and diamond grinding is settled among professionals: grinding wins decisively for Texas applications. While acid etching uses muriatic acid to chemically open concrete pores, it presents multiple problems in the Texas context.
First, Texas concrete is often too dense for effective acid etching, particularly in newer homes where high-strength mixes (4,000+ PSI) are standard. The acid simply cannot penetrate deeply enough to create adequate profile. Second, the process is hazardous, producing toxic fumes that are dangerous in enclosed garage spaces and creating disposal challenges for the acidic runoff.
Most importantly, industry experts from Sherwin-Williams emphasize that mechanical profiling is the gold standard, describing acid etching as “messy, hazardous, and insufficient for professional results.” Grinding provides consistent, measurable results regardless of concrete density or previous sealers.
For DIY enthusiasts, grinders can be rented from major home improvement stores for $50-100 per day. However, the learning curve is steep, and improper technique can create waves or uneven profiles. Professional installers handle 85% of Texas epoxy jobs because they have the expertise and equipment to achieve optimal results quickly.
When Is Primer Necessary for Texas Garage Floors?
Primer serves multiple critical functions in epoxy installations, particularly important for challenging Texas conditions. It seals porous concrete to prevent outgassing (air bubbles rising through the epoxy), enhances adhesion on marginal substrates, and provides moisture mitigation when needed.
Primer is essential when working with concrete that has cracks exceeding 1/8 inch, as it helps seal voids and prevent air from becoming trapped beneath the epoxy layer. It’s also mandatory when moisture testing reveals MVT levels between 3-5 lbs/1,000 sq ft/24 hrs. For older Texas homes (pre-1990s construction), primer application is considered best practice regardless of test results.
High-quality epoxy primers also improve adhesion to concrete with lower compressive strength (below 3,000 PSI) or concrete that has been contaminated with oils despite cleaning efforts. The primer penetrates deeply, creating a chemical and mechanical bond that significantly reduces delamination risk. Application involves rolling a thin, even coat across the entire prepared surface, typically requiring 4-6 hours of cure time before epoxy topcoat application.
What Are the Ideal Temperature and Timing Conditions?
Understanding how to prepare garage floor for epoxy in Texas means working within specific temperature and humidity windows. Epoxy chemistry is temperature-dependent, with optimal application occurring between 60-90°F, though products vary in their acceptable ranges.
Texas presents seasonal challenges: summer temperatures often exceed 100°F, causing epoxy to cure too rapidly and potentially trap bubbles or create an uneven finish. Conversely, winter nights in North Texas can drop below 40°F, slowing cure times dramatically. The ideal installation windows are October through April for most of Texas, with coastal areas offering more flexibility due to moderate temperatures.
Humidity also affects cure rates and final properties. While Texas coastal humidity (60-80%) isn’t prohibitive, it does extend cure times by 20-40% compared to arid conditions. Plan for extended walk-on times (24-36 hours instead of 12-24 hours) and full cure periods (7-10 days instead of 5-7 days) in humid regions. Polyaspartic topcoats have gained popularity in Texas precisely because they cure rapidly even in humid conditions, achieving 55% market share in Houston for heat-resistant finishes as of 2026.
For new concrete, patience is critical: wait at least 30 days after pouring before epoxy application, allowing time for the slab to cure and pH levels to drop below 10. Testing pH with indicator strips prevents adhesion failures caused by alkaline concrete. To understand longevity expectations, review our analysis of how long epoxy floors last in Austin.
Should You DIY or Hire Professionals in Texas?
The DIY versus professional decision hinges on several factors specific to Texas garage floor preparation. While material costs for DIY range from $2-4 per square foot for quality epoxy systems, professional installation typically ranges from $5,000 to $15,000+ for a standard two-car garage, depending on surface condition, desired finish complexity, and coating system selected.
DIY advantages include cost savings and personal satisfaction, but significant challenges exist. Renting or purchasing a quality diamond grinder, moisture testing equipment, and proper safety gear adds $200-500 to project costs. The physical demand of grinding 400-600 square feet of concrete shouldn’t be underestimated, nor should the risk of creating an uneven surface profile that compromises the final result.
Professional installers bring expertise in moisture testing, crack evaluation, and proper mixing ratios, critical because epoxy is unforgiving of errors. They also carry insurance protecting homeowners from damage during installation. In competitive Texas markets like Austin and Dallas, professionals complete preparation and installation in 2-3 days versus 4-7 days for most DIY projects when accounting for learning curves and equipment limitations.
| Factor | DIY Approach | Professional Installation |
|---|---|---|
| Material Cost | $800-1,600 (400 sq ft) | Included in total price |
| Equipment Rental | $200-500 | N/A (contractor-owned) |
| Labor Time | 4-7 days | 2-3 days |
| Warranty | Product only | 5-15 year installation warranty |
For those seeking local options, explore garage floor epoxy contractors near you in Austin to compare professional services. When selecting contractors, verify they perform proper moisture testing, use mechanical grinding (not just etching), and provide detailed warranties covering both materials and installation.
The investment in professional preparation and installation pays dividends in longevity. Properly installed systems in Texas regularly last 15-20 years with minimal maintenance, while DIY installations with preparation shortcuts often fail within 3-5 years, requiring complete removal and reinstallation at double the initial cost. For detailed pricing information specific to your project scope, visit our comprehensive epoxy floor cost guide for Texas.
People Also Ask
How long should new concrete cure before applying epoxy in Texas?
New concrete in Texas should cure for at least 30 days before epoxy application to allow moisture levels to stabilize and pH to drop below 10. In humid coastal regions, extending this to 45-60 days ensures optimal conditions, particularly for slabs without vapor barriers.
Can you apply epoxy over previously sealed concrete in Texas?
Yes, but the sealer must be completely removed through diamond grinding to expose fresh concrete. Acid etching is ineffective on sealed surfaces, which is why mechanical grinding is essential for Texas garage floors that may have been sealed during construction or by previous owners.
What CSP profile is required for epoxy adhesion?
Epoxy requires a CSP 2-3 surface profile, which feels like 60-80 grit sandpaper. This level of texture provides adequate mechanical bonding surface and is best achieved through diamond grinding rather than chemical etching in Texas’s dense concrete.
Will Texas heat affect epoxy garage floor performance?
Quality epoxy systems withstand Texas heat when properly installed, with polyaspartic topcoats rated to 300°F. However, application during extreme heat (above 95°F) can cause rapid curing and trapped bubbles, making fall through spring the ideal installation window for most of Texas.
How do you remove oil stains before epoxy preparation?
Use commercial concrete degreasers applied generously to stained areas, allowing 15-20 minutes dwell time before scrubbing with stiff brushes. Stubborn oil stains may require multiple applications or poultice treatments before final power washing at 3,000+ PSI to ensure complete removal.
Is moisture testing really necessary for Texas garage floors?
Absolutely, particularly for pre-1990s homes without vapor barriers and in humid regions like Houston. With 40% of Texas epoxy failures attributed to moisture issues, calcium chloride testing is essential insurance against costly delamination from moisture vapor transmission exceeding safe levels.
Frequently Asked Questions
What happens if I skip the grinding step when preparing my Texas garage floor?+
Skipping proper grinding dramatically increases failure risk, with delamination rates jumping from under 2% to 25-30% or higher. Without adequate surface profile, epoxy cannot mechanically bond to the concrete and will eventually lift, particularly under the stress of Texas temperature fluctuations and potential moisture transmission through the slab.
Can I prepare and coat my garage floor in one day in Texas?+
While technically possible with fast-cure systems, it’s not recommended for Texas conditions. Proper preparation requires cleaning, drying (24-48 hours), grinding, additional drying, primer application, and cure time before topcoat. Rushing this process compromises adhesion and typically results in premature failure requiring complete reinstallation.
How much does professional garage floor preparation cost in Texas?+
Professional preparation and installation pricing varies widely based on concrete condition, garage size, coating system selected, and finish complexity. Total project investments typically range from $5,000 to $20,000+ for residential garages, with custom decorative finishes and premium systems commanding higher prices. Contact qualified contractors for detailed quotes based on your specific project requirements and conditions.
What’s the best time of year to install epoxy in Texas?+
October through April offers ideal conditions for most of Texas, with moderate temperatures (60-80°F) and lower humidity levels that promote proper curing. Avoid summer months when garage temperatures can exceed 100°F, causing rapid cure and potential application problems. Coastal areas have more flexibility due to Gulf moderation of extreme temperatures.
Do I need special equipment to grind my garage floor?+
Yes, diamond grinding requires industrial grinders with diamond-impregnated segments, dust collection systems, and proper safety equipment including respirators and eye protection. These can be rented from equipment suppliers for $50-100 per day, but the learning curve is significant and improper technique can create uneven profiles that compromise the final installation.
How long does properly installed epoxy last in Texas climates?+
With proper preparation including grinding, moisture mitigation, and quality materials, epoxy garage floors regularly last 15-20 years in Texas with minimal maintenance. Polyaspartic topcoats extend this further by providing superior UV resistance and heat tolerance. Inadequately prepared floors often fail within 3-5 years, making proper initial preparation the critical investment.
Should I hire a foundation expert before epoxy installation?+
If your garage has cracks wider than 1/4 inch, significant settling, or ongoing foundation movement common in Texas clay soils, consult a foundation specialist before investing in epoxy. Active movement will cause any coating to crack and fail, making foundation stabilization the necessary first step for long-term success.
Key Takeaways
- Diamond grinding to CSP 2-3 profile is essential for Texas garage floors, reducing failure rates to under 2% compared to 25-30% with inadequate acid etching alone.
- Moisture testing is mandatory for pre-1990s homes and humid regions, with 40% of Texas epoxy failures attributed to moisture vapor transmission exceeding safe levels.
- Proper cleaning and degreasing cannot be skipped, as even microscopic contamination prevents epoxy bonding and leads to premature delamination.
- Timing matters in Texas, with October through April providing ideal temperature and humidity conditions for installation, avoiding summer heat extremes.
- Professional installation offers significant advantages including proper moisture testing, equipment, expertise, and warranties that protect your investment long-term.
- All cracks must be properly repaired before coating, with cracks exceeding 1/4 inch indicating potential structural issues requiring foundation evaluation.
- Primer application is essential for older concrete, high moisture readings, or marginal substrates to ensure proper adhesion and prevent outgassing bubbles.
Understanding how to prepare garage floor for epoxy in Texas is the foundation of a successful, long-lasting installation. While the process requires significant effort and attention to detail, the result is a beautiful, durable surface that enhances your home’s value and functionality for decades. Whether you choose the DIY route or professional installation, never compromise on preparation quality.
For Texas homeowners ready to transform their garage with professional-grade epoxy flooring, Epoxy of Texas provides expert preparation and installation services throughout the state. Our team specializes in the unique challenges of Texas concrete and climate, ensuring your investment delivers maximum performance and longevity. Contact us today for a detailed assessment and custom quote for your specific project needs.